Arquivos para educação

“Listening Temperature” with TinyML

10 10-03:00 fevereiro 10-03:00 2022 — Deixe um comentário

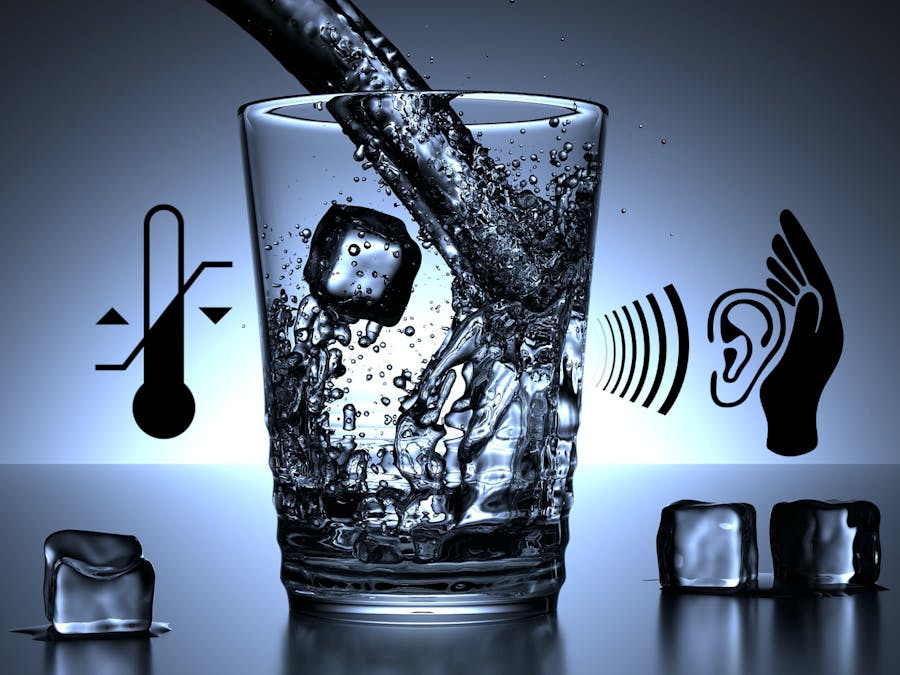
Can we “hear” a difference between pouring hot and cold water? Amazing proof-of-concept by a quick real deployment using Edge Impulse Studio

"Listening Temperature" with TinyML

Introduction

A few months ago, my dear friend Dr. Marco Zennaro from ICTP, Italy, asked me if I heard that we humans could distinguish between hot and cold water only by listening to it. At principle, I thought that I was the one who did not listen to him well! 😉 But when he send me this paper: Why can you hear a difference between pouring hot and cold water? In an investigation of temperature dependence in psychoacoustics, I realized that Dr. Marco was pretty serious about it!

The first thing that called my attention reading the paper was the mention of this youtube video (please, watch the video and try it yourself before going on with the reading). Uaw! I could easily differentiate between the two different temperatures, only by the sound of water splashing in the cup (could you?) But why did this happen? The video mentioned that the change in the water splashing changes the sound that it makes because of various complex fluid dynamic reasons’. Not much explanation on this. Others say “that the viscosity changed with the temperature” or that it must be something with hot liquid tending to be more “bubbling.” Anyway, according to the paper’s researches, all of this is only speculation.

Besides the scientific investigation on it (what should be very interesting), the question that comes to us was: Is this ability of “listening temperatures” something replicable using Artificial Neural Networks? We did not know, but let’s try to create a simple experience using TinyML (Machine Learning applied to embedded devices).

Uaw! I could easily differentiate between the two different temperatures, only by the sound of water splashing in the cup (could you?) But why did this happen? The video mentioned that the change in the water splashing changes the sound that it makes because of various complex fluid dynamic reasons. Not much explanation on this. Others say that the viscosity changed with the temperature or that it must be something with hot liquid tending to be more bubbling. Anyway, according to the paper’s researches, all of this is only speculation.

Besides the scientific investigation on it (what should be very interesting), the question that comes to us was: Is this ability of listening temperatures something replicable using Artificial Neural Networks? We did not know, but let’s try to create a simple experience using TinyML (Machine Learning applied to embedded devices) and find the answer!

The Experiment

image.png

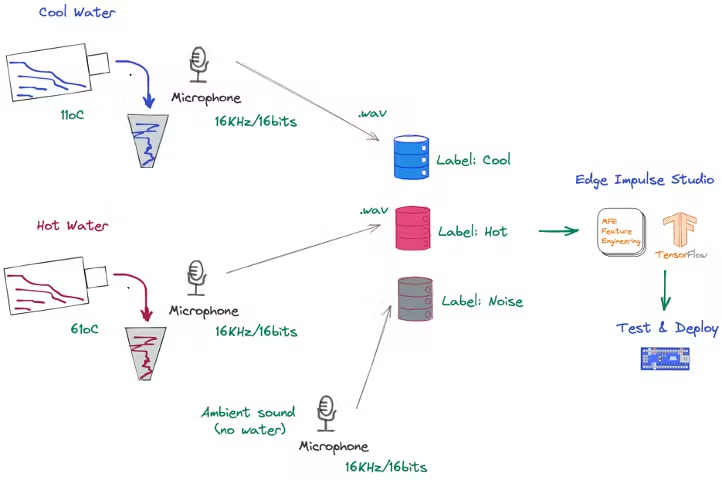
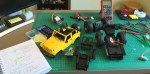
First, this is a simple proof-of-concept, so let us reduce the variables. Two similar glasses were used (same with the plastic recipient where the water was collected). The water temperatures were very different, with a 50oC range between them. (11oC and 61oC).

Each sample was around the time that the glass took to be filled (3 to 5 seconds).

Note that we were interested in capturing the sound of the water only during the pouring process.

The sound was captured by the same digital microphone (sampling frequency: 16KHz. Bit Depth: 16 Bits) and stored as.wav files in 3 different folders:

  • Cold Water sound (“Cool”)
  • Hot Water sound (“Hot”)
  • No water sound (“Noise”).

The Cold Water label should be better defined as “cold” instead of “cool”, but once this is not a scientific paper, was cool leave it as ”cool” 😉

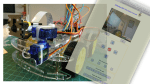
With the dataset captured, we uploaded it to Edge Impulse Studio, where the data were preprocessed, the Neural Network (NN) model was trained, tested, and deployed to an MCU for real physical test (an iPhone was also used for live classification).

Continue lendo…

When we are talking about physical variables, as temperature, pressure, etc., as a Data Scientist, usually we start working from a dataset that was created somewhere else. But have you thought about how to capture those data yourself?

On this tutorial we will get data from several different sensors, sending them to an IoT service, ThingSpeak.com and to a mobile App (Thingsview), where we can log and play with data. We will explore several different communication ways of connecting sensors to a Raspberry Pi, as:

  • DHT22 – Temperature & Humidity Sensor – Digital Comm
  • DS18B20 – Temperature Sensor – 1-Wire
  • BMP180 – Temperature & Pressure Sensor – I2C
  • UV – Ultra Violet Sensor – Analog Sensor via A/D and SPI bus

In short, all data will be captured, saved locally on a CSV file and send to an IoT service (ThingSpeak.com), via MQTT protocol, as you can see on below block diagram:

To complete a real Weather Station, on the final step, you will also learn how to measure wind speed and direction, following Mauricio Pinto‘s tutorial.
Continue lendo…

ArduFarmBot, the book is alive!

14 14-03:00 abril 14-03:00 2017 — Deixe um comentário

A versão em inglês do ArduFarmBot já está na Amazon, mas não se esqueça que a versão original em português também poderá ser adquirida no link: ArduFarmBot (Portuguese Edition)

The English version of ArduFarmBot is alive at Amazon.com! You can get it, clicking the below banner:

Amazon_book

The book uses the electronic controller ArduFarmBot as a basis for learning how to work in both HW and SW, with a) LCD and OLED type displays; b) LEDs and buttons; c) Activation of pumps and lamps via relays and d) Sensors such as: DHT22 (temperature and relative air humidity), DS18B20 (soil temperature), YL69 (soil moisture) and LDR (luminosity).

Continue lendo…

Robô controlado por voz via WiFi

4 04-03:00 abril 04-03:00 2017 — 4 Comentários

Em meu último tutorial: Controle ativado por voz com Android e NodeMCU, exploramos como desenvolver nossa própria App em um smartphone Android para controlar localmente (usando botões ou voz) dispositivos domésticos inteligentes. Que tal agora, em vez de dispositivos domésticos controlarmos motores? E melhor ainda, que tal ter esses motores movendo um robô? Pois isso, é exatamente o que desenvolveremos aqui, um robô controlado por voz via WiFi e utilizando como microcontrolador nosso velho amigo, o NodeMCU!

O diagrama de blocos abaixo nos dá uma geral sobre o projeto que desenvolveremos aqui:

WiFi_Robot_Block_Diagram

e o filme nos mostra como ficará o projeto:

Por favor, considere que um de meus motores estava com muito pouco torque. Apesar de o resultado parecer estranho, o projeto funciona a contento. Assim que mudar o motor, atualizarei o vídeo. Obrigado.

Continue lendo…

Como um dos vencedores do concurso “Robotics 2016” do Instructables, recebi como prêmio da empresa iRobot, um robô aspirador Roomba Create2. Neste post, vou contar um pouco de minhas primeiras aventuras com o garoto!

Continue lendo...

Este é um grande exemplo do fascinante mundo do IoT, onde o que aprenderemos com o robô, poderá ser utilizado para controlar qualquer coisa pela internet!

Continue lendo...

Neste projeto, vamos desarmar um carrinho de controle remoto, substituindo sua eletrônica por um microprocessador Arduino controlado por dispositivo Android.

Continue lendo...

A edição de maio da revista britânica MagPi publicou uma matéria muito legal sobre meu Projeto “Mars Rover Tupiniquin”. Para quem não conhece, a MagPi é a revista oficial do RapsberryPi. Você pode baixar grátis as edições da revista em PDF.

A edição de maio (45) pode ser baixada no link: https://raspberrypi.org/magpi-issues/MagPi45.pdf

Espero que gostem!

(A repórter trocou o meu nome por “Marcio”, mas está valendo! 😉

IMG_0471

IMG_0472

Não deixe de visitar e seguir minha página: MJRoBot.org no Facebook

Saludos desde el sur del mundo! 😉

Um abraço e obrigado

Marcelo

Conectando “coisas” através do Bluetooth

30 30-03:00 janeiro 30-03:00 2016 — 14 Comentários


bluetooth-logo

Uma rede sem fio local (e pessoal) porreta é sem dúvida a Bluetooth (BT). Hoje em nosso dia-a-dia é comum encontrar-nos com celulares, aparelhos de som, cameras, etc., entrelaçados com a ajuda da famosa “luzinha azul”

No mundo do IoT e da automação em geral, é muito comum deparar-nos com controles remotos via celulares utilizando tecnologia BT. Isso é devido a 2 componentes básicos mas muito importantes:

  1. Plataforma de desenvolvimento para OS ANDROID
  2. Módulos BT baratos e acessíveis (Como por exemplo o HC-06)

Neste tutorial, vou desenvolver algumas idéias de como controlar as saídas de um Arduíno através de um celular de maneira a mover um Robot, acionar lâmpadas em uma casa, etc.

No mercado é comum encontrar módulos de BT 3.0  “Master-Slave” como o HC-05  e “Slaves” como o HC-06. Já mais recentemente, apareceram os HC-08 e HC-10 que trabalham com tecnologia BT 4.0 ou BLE (“Bluetooth Low Energy”). Os módulos BLE são os únicos que podem ser conectados a um Iphone, pois infelizmente a Apple não fornece suporte a ao BT 3.0.

Para os projetos discutidos aqui, usarei um HC-06 que é bem popular e barato (Bye, bye, Iphone, vamos de Android!). O Módulo é alimentado com 5V o que faz com que ele seja facilmente conectado a um Arduino

HC06 Pins
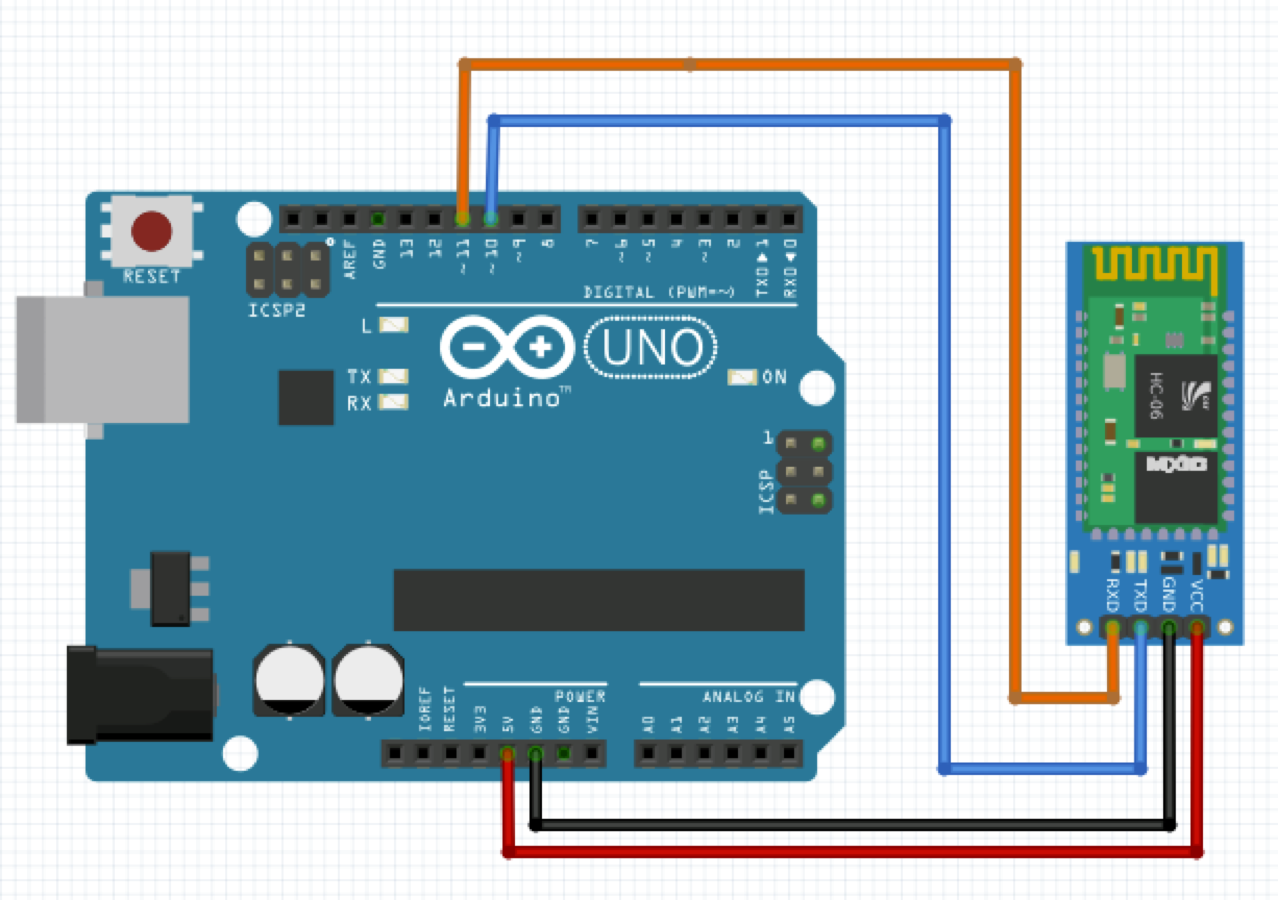
UNO por exemplo, para receber e transmitir informações a outros dispositivos como um PC ou um telefone celular. Seus pinos de transmissão e recepção podem ser conectados diretamente ao UNO, não havendo a necessidade de se utilizar divisores de tensão como vimos no caso do ESP8266.

Na prática, o HC-06 deve ser ligado diretamente aos pinos 0 e 1 do Arduino (Serial):

  • HC06-Tx ao Arduino pin 0 (Rx)
  • HC06-Rx ao Arduino pin 1 (Tx)

Ao se usar a entrada serial por HW do UNO é muito importante lembrar-se que o HC-06 não pode estar fisicamente conectado aos pinos 0 e 1 durante a carga do programa, isso porque o USB também usa essa mesma serial.  Uma maneira simples de se contornar esse probleminha (se seu projeto não utiliza muitos GPIOs do UNO) é usar uma porta serial por SW através da library SoftwareSerial (a mesma que usamos no caso do ESP8266). Em nosso caso aqui, usaremos os pinos 10 e 11 do UNO (Tx, Rx respectivamente).

UNO-HC06

Continue lendo…

Para começar (e se desenvolver) no mundo da eletrônica, o melhor caminho sem dúvida é a internet! Vai aqui uma super dica de como se tornar um grande programador através da técnica do “Psychding”:

Psychding

Heheheheheh! Seria bom se só isso resolvesse! Mas ajuda, claro! Mas para aprender mesmo, vale a pena uns cursos, muita leitura e claro, “mãos na massa!”. Para o pessoal que está no Brasil um site muito legal é o:

Laboratório de Garagem

Como o pessoal do Garagem mesmo explica, “O Laboratório de Garagem é uma iniciativa voltada para a integração, colaboração e apoio aos desenvolvedores independentes de ciência e tecnologia, ou como gostamos de ser chamados: garagistas.

Somos uma rede social, uma incubadora, uma loja virtual e um grupo de pessoas que acreditam que a próxima revolução pode (e vai) sair de uma garagem, ainda mais se ela estiver conectada a muitas outras garagens.

Eu também sou um dos garagistas e tenho procurado dar meus pitecos por lá. Vale a pena se associar, participar, mandar sugestões, etc. O pessoal de lá é muito legal, estão sempre prontos a ajudar, não importando se as dúvidas são básicas ou complicadas!

O Lab de Garagem por exemplo, tem um curso on-line básico muito legal (em português) para quem quer se iniciar no mundo dos Arduinos:

Curso Arduino – Loboratorio de Garagem

É isso aí! Inté!

Marcelo Rovai no Garagem