
This is a very simple tutorial to show how ease is to implement an IoT project with NodeMCU and Blynk.
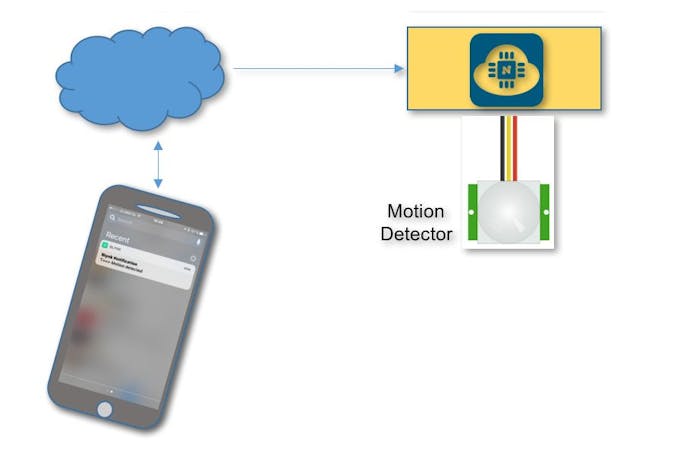
Any time that we a movement is detected by the sensor, a message provide by Blynk is send to a smartphone.
Step 1: Bill of Material
- NodeMCU ESP12-E $8.89
- Motion Sensor HC-SR501 $2.57
- Resistor (1K, 2.2K and 330ohm)
- LED
- Breadboard
- Cables
Step 2: The HC-SR501 Passive Infrared (PIR) Motion Sensor
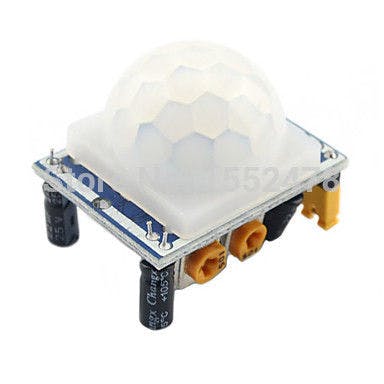
This motion sensor module uses the LHI778 Passive Infrared Sensor and the BISS0001 IC to control how motion is detected.
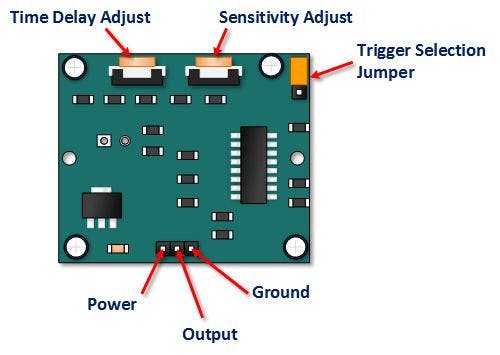
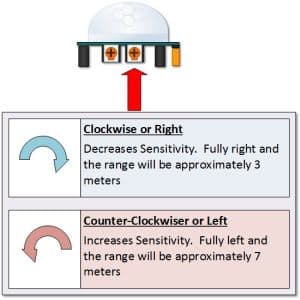
The module features adjustable sensitivity that allows for a motion detection range from 3 meters to 7 meters.

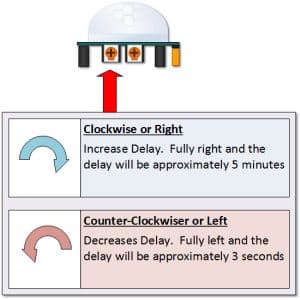
The module also includes time delay adjustments and trigger selection that allow for fine tuning within your application.
The bellow link is a great article that explain in details how the sensor works:
Arduino HC-SR501 Motion Sensor Tutorial
Step 3: The HW
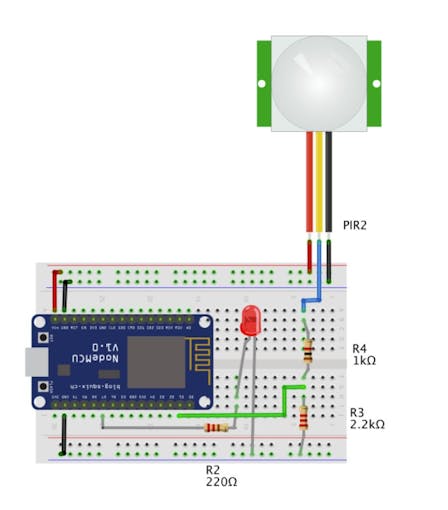
The HW is very simple. The sensor has 3 pins (+5V, GND and Output). It is important to remember that its output generate a logic signal +5V (HIGH) or OV (LOW) that IT IS NOT COMPATIBLE with NodeMCU input levels (it works with 3.3V level). So, you will need a voltage divider to convert the signal levels (see the above diagram).
- HC-SR501 Output to the Input of Voltage divider
- NodeMCU Pin D1 (GPIO 5) to the middle point of Voltage Divider
We have also included a LED at pin D7 (GPIO13), for a local visualization.
Step 4: Testing the sensor
First let’s us do a simple test for testing and calibrating the sensor.
Upload the bellow code at Arduino IDE:
/* HC-SR501 Motion Detector */
#define ledPin D7 // Red LED
#define pirPin D1 // Input for HC-SR501
int pirValue; // variable to store read PIR Value
void setup()
{
  pinMode(ledPin, OUTPUT);
  pinMode(pirPin, INPUT);
  digitalWrite(ledPin, LOW);
}
void loop()
{
  pirValue = digitalRead(pirPin);
  digitalWrite(ledPin, pirValue);
}
When doing a movement in front of the sensor, you will see the Red LED turn ON. You can use the above code for adjustments in the sensor if needed.
NOTE: We are supposing here that you have already prepared your Arduino IDE to handle the NodeMCU. If not, please take a look at my tutorial:
From blink to Blynk, an IoT jorney on the wings of NodeMCU ESP-12E
Step 5: Including BLYNK
Follow the bellow steps:
- Create a New Project.
- Give it a name (in my case “Motion Detector“)
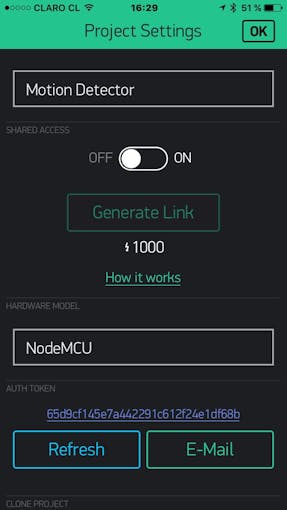
- Select NodeMCU as HW Model
- Copy the AUTH TOKEN to be used in the code (you can send it to your email).
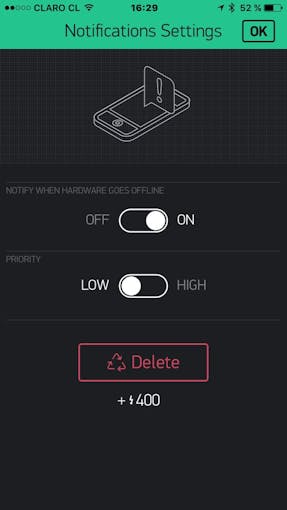
- Includes a “Push Notification” Widget.
- Press “Play” (The triangle at right up corner)

Of course, the Blynk App will tel you that the NodeMCU is off line.
It’s time to upload the full code at your Arduino IDE:
/**************************************************************
 * IoT Motion Detector with Blynk
 * Blynk library is licensed under MIT license
 * This example code is in public domain.
 *
 * Developed by Marcelo Rovai - 30 November 2016
 **************************************************************/
#include
#define BLYNK_PRINT Serial    // Comment this out to disable prints and save space
#include
char auth[] = "YOUR AUTH CODE HERE";
/* WiFi credentials */
char ssid[] = "YOUR SSID";
char pass[] = "YOUR PASSWORD";
/* HC-SR501 Motion Detector */
#define ledPin D7
#define pirPin D1 // Input for HC-S501
int pirValue; // Place to store read PIR Value
void setup()
{
  Serial.begin(115200);
  delay(10);
  Blynk.begin(auth, ssid, pass);
  pinMode(ledPin, OUTPUT);
  pinMode(pirPin, INPUT);
  digitalWrite(ledPin, LOW);
}
void loop()
{
  getPirValue();
  Blynk.run();
}
/***************************************************
 * Get PIR data
 **************************************************/
void getPirValue(void)
{
  pirValue = digitalRead(pirPin);
  if (pirValue)
  {
    Serial.println("==> Motion detected");
    Blynk.notify("T==> Motion detected");
  }
  digitalWrite(ledPin, pirValue);
}
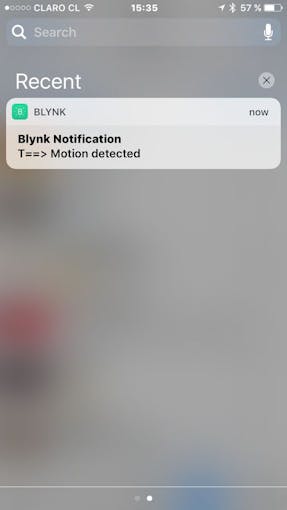
Once the code is uploaded and running, check the BLYNK app. It should be now also running.
Make a movement in front of the sensor. Now you must receive a message in your mobile as show bellow.
Bellow the full Arduino code for your project:
Step 6: Conclusion
Saludos from the south of the world!
See you at my next tutorial!
Thank you
Marcelo


