
It’s amazing how quickly you can put together an IoT protect using a NodeMCU and a Blynk app.
On this tutorial we will learn about a great, reliable and easy to use digital temperature sensor, the DS18B20.
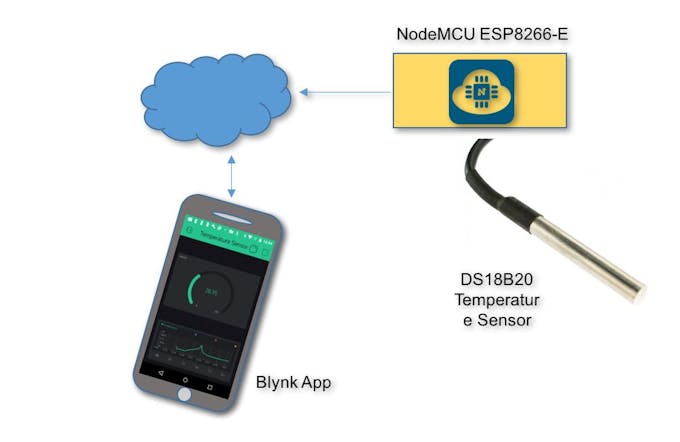
Also as shown at above block diagram, the collected data from the sensor will be upload to internet with a help of a NodeMCU ESP8266-E and monitored on a Smart device using the Blynk app.
1: Bill of Material
- Resistor 4.7K Ohms
2: DS18B20 Temperature Sensor
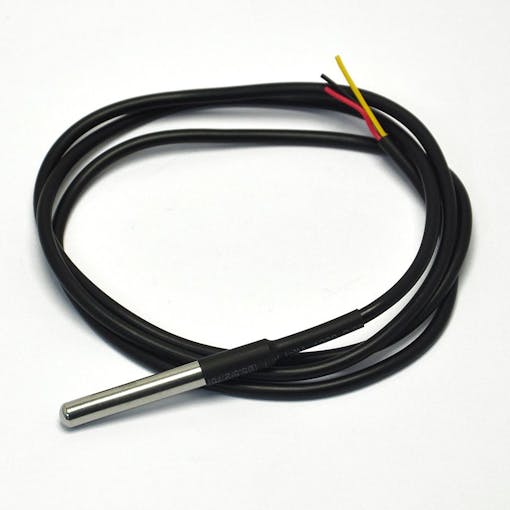
We will use on this tutorial a waterproofed version of the DS18B20 sensor. It is very useful for remote temperature on wet conditions, for example on a humid soil. The sensor is isolated and can take measurements until 125oC (Adafrut does not recommend to use it over 100oC due its cable PVC jacket.
The DS18B20 is a digital sensor what makes it good to use even over long distances! These 1-wire digital temperature sensors are fairly precise (±0.5°C over much of the range) and can give up to 12 bits of precision from the onboard digital-to-analog converter. They work great with the NodeMCU using a single digital pin, and you can even connect multiple ones to the same pin, each one has a unique 64-bit ID burned in at the factory to differentiate them.
The sensor works from 3.0 to 5.0V, what means that it can be powered directly from one of the 3.3V NodeMCU pins.
The sensor has 3 wires:
- Black: GND
- Red: VCC
- Yellow: 1-Wire Data
Here, you can find the full data: DS18B20 Datasheet
3: Connecting the sensor to NodeMCU
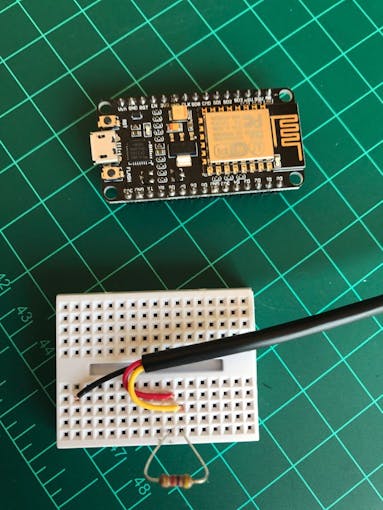
Connect the 3 wires from sensor at the mini Breadboard as shown at the bellow diagram: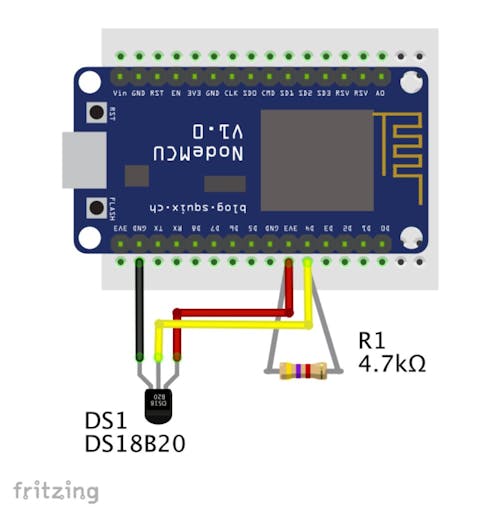
Pay carefully attention where the NodeMCU pins will be
inserted.
- Red ==> 3.3V
- Black ==> GND
- Yellow ==> D4
Insert the NodeMCU, on a way that its pins will match with the above electrical diagram. Note that pressing the chip over the sensor cable, will will help to keep the sensor contacts on place.
Insert the 4.7K ohms resistor between VCC (3.3V) and Data (D4)

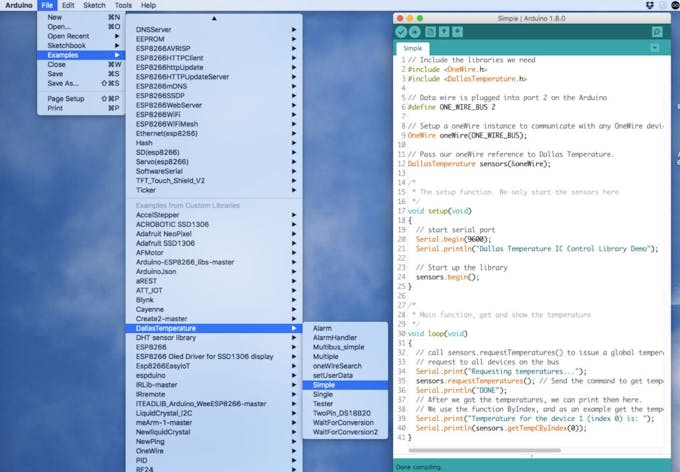
4: Installing the appropriated libraries
In order to use the DS18B20 properly, two libraries will be necessary:
Install both libraries in your Arduino IDE Library depository.
Note that the OneWire library MUST be the special one, modified to be used with ESP8266, otherwise you will get an error during compilation. You will find the last version at above link or from the bellow zip file:
5: Testing the sensor
Upload the code in your NodeMCU and monitor the temperature using the Serial Monitor.
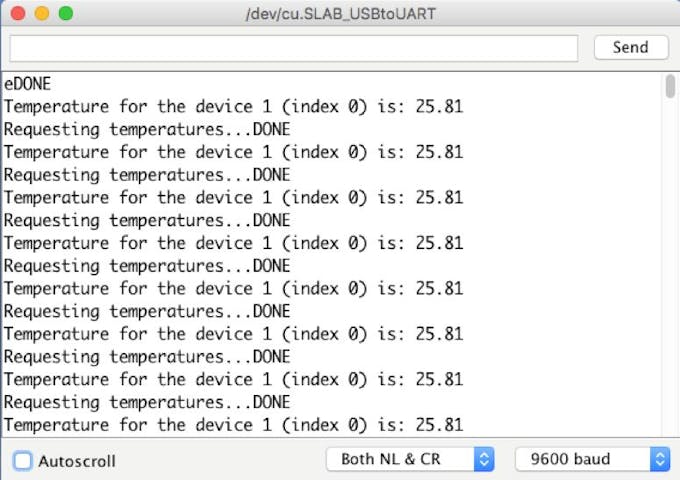
The above photo shows the expected result. Hold the sensor in your hand, you should see the temperature going to circa of 32/34oC.
6: Using Blynk
Follow the bellow steps:
Create a New Project.
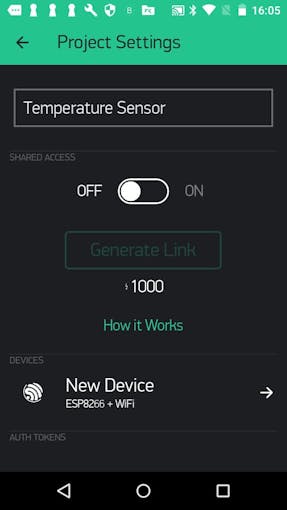
- Give it a name (in my case “Temperature Sensor”)
- Select NodeMCU as HW Model
- Copy the AUTH TOKEN to be used in the code (you can send it to your email).
Includes a “Gauge” Widget
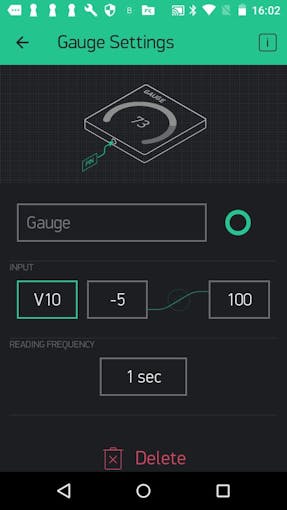
Define:
- Virtual pin to be used with the sensor: V10
- The temperature range: -10 to 100 oC
- The frequency to read data: 1second
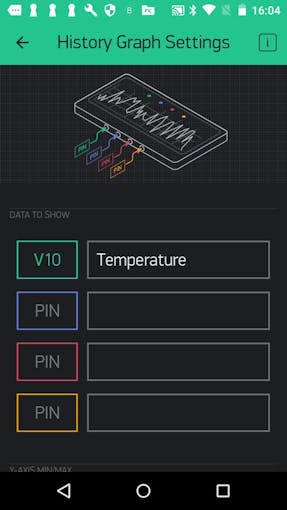
Includes a “History Graph” Widget, defining V10 as virtual pin
Press “Play” (The triangle at right up corner)
Of course, the Blynk App will tell you that the NodeMCU is off line. It’s time to upload the full code at your Arduino IDE:
/**************************************************************
 * IoT Temperature Monitor with Blynk
 * Blynk library is licensed under MIT license
 * This example code is in public domain.
 *
 * Developed by Marcelo Rovai - 05 January 2017
 ***************************************************************/
/* ESP & Blynk */
#include <ESP8266WiFi.h>
#include <BlynkSimpleEsp8266.h>
#define BLYNK_PRINT Serial    // Comment this out to disable prints and save space
char auth[] = "YOUR AUTH CODE HERE";

/* WiFi credentials */
char ssid[] = "YOUR SSID";
char pass[] = "YOUR PASSWORD";

/* TIMER */
#include <SimpleTimer.h>
SimpleTimer timer;

/* DS18B20 Temperature Sensor */
#include <OneWire.h>
#include <DallasTemperature.h>
#define ONE_WIRE_BUS 2 // DS18B20 on arduino pin2 corresponds to D4 on physical board
OneWire oneWire(ONE_WIRE_BUS);
DallasTemperature DS18B20(&oneWire);
float temp;

void setup()
{
  Serial.begin(115200);
  Blynk.begin(auth, ssid, pass);
  DS18B20.begin();
  timer.setInterval(1000L, getSendData);
}

void loop()
{
  timer.run(); // Initiates SimpleTimer
  Blynk.run();
}

/***************************************************
 * Send Sensor data to Blynk
 **************************************************/
void getSendData()
{
  DS18B20.requestTemperatures();
  temp = DS18B20.getTempCByIndex(0);
  Serial.println(temp);
  Blynk.virtualWrite(10, temp); //virtual pin V10
}
Once the code is uploaded and running, check the BLYNK app. It should be now also running.
Bellow the full Arduino code for your project:
7: Conclusion
As always, I hope this project can help others find their way in the exciting world of electronics and IoT!
Saludos from the south of the world!
See you at my next tutorial!
Thank you
Marcelo


